Ever since Frank Kern started making his automated webinars with the evergreen dates, follow-up based on whether you attended or not, and even SMS reminders to let you know when the webinar was about to start…people have been wondering “How did he do it?”
In today’s brand new idea guide, I show you the method he and others use for making a similar automated webinar using Infusionsoft and PlusThis.
After watching the idea guide you will be able to…
- Make a registration page with evergreen dates for people to register
- Automate your webinar content
- Create a join link that takes registrants to the correct webinar page based on when they click the link (too early, live webinar, webinar over)
- Automate segmentation between registrant attendees and non-attendees so you can follow-up accordingly
As you send me your questions I’ll try to keep an updated FAQ on this particular use case since it is a little more advanced to pull off.
FAQ
1. How do I make a video autoplay on the “LIVE” page?
Wistia makes it simple to do auto play. There are a few ways you can do this.
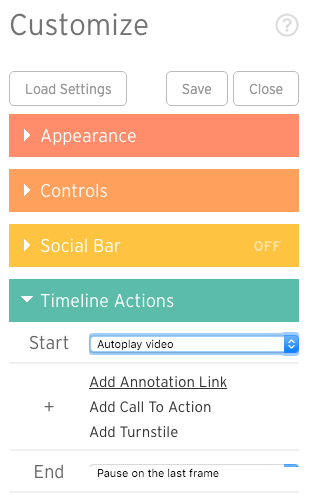
If you go to Customize / Timeline Actions you can see an option directly there.
Otherwise, you can add the following snippet of code to the end of your embed code where you place the video.
Just remember to change the part in red to the Wistia ID for your video. (The letter number combination that appears in the url when you have the video open in your browser.)
<script type=”text/javascript”>
window._wq = window._wq || [];
_wq.push({ “tl9y8t9xvh“: function(video) {
video.play();
}});
</script>
![]()
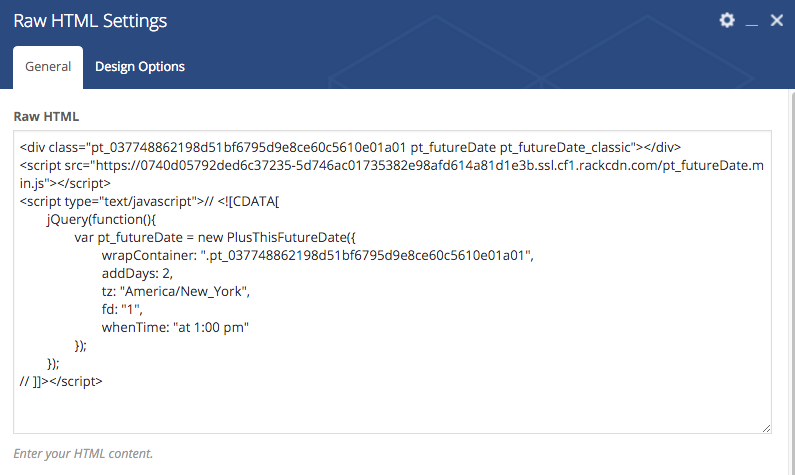
2. How do I style the PlusThis “Display Evergreen Date”
This is what a “Display Evergreen Date” looks like in its vanilla form.

We will want to make it bigger and bold.
- Take your “Display Evergreen Date” code from PlusThis and paste it into your page builder. (See example below)
2. Preview or publish your page.
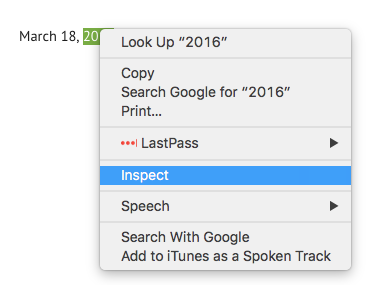
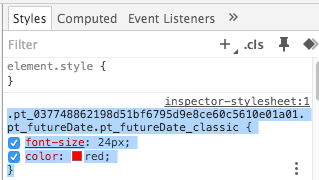
3. Right click on the “Display Evergreen Date” text and click Inspect.
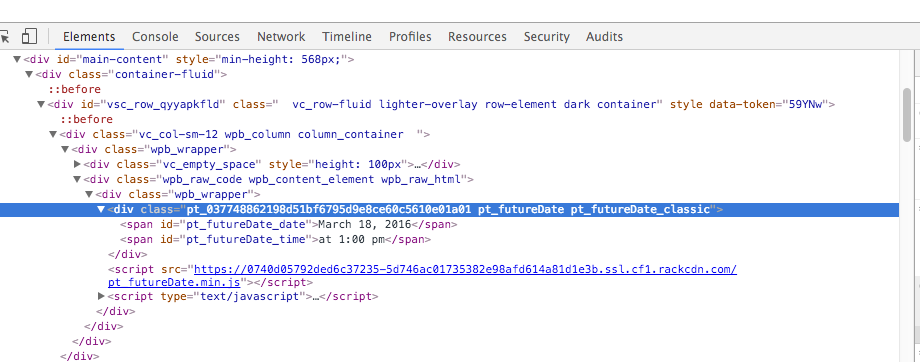
4. Click on the div class above starting with pt then your code.
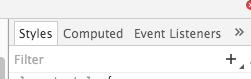
5. On the right side of that window, click on the plus icon to create a new style element.
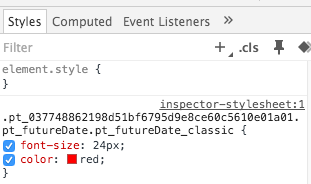
6. In the inspector-stylesheet begin adding any styling you want. ie font-size, color, etc. Just place your cursor somewhere in that box and begin typing things like font-size, color, or any other styling rules you want to add. You’ll see the changes happen live on your screen.
7. When you have the style how you want it copy the code in that box.
8. Take that code and now paste it above the “Display Evergreen Date” code you pasted earlier.
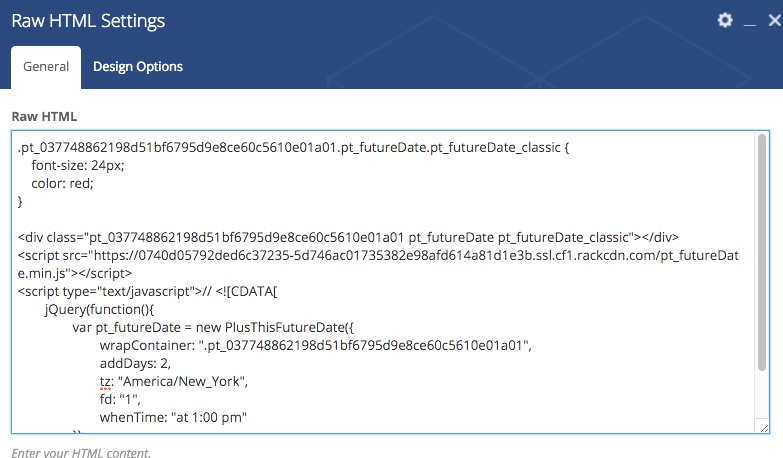
9. Lastly, add the <style> and </style> tags to the beginning and end of that code to use the styling you just created.
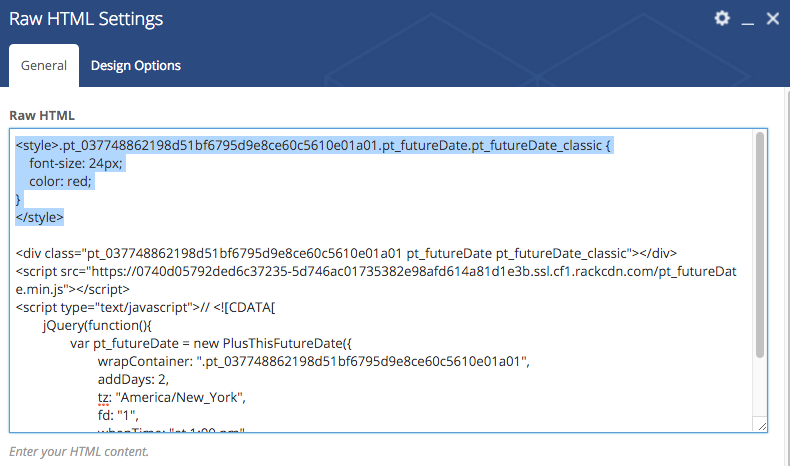
10. Update your page and see the beautiful new “Display Evergreen Date”

If you have any other questions, feel free to post them in the comments below.