First, let’s clarify what we mean by evergreen expiring offers, as evergreen in this context means long lasting and relevant, while expiring means that the offer only lasts for a certain amount of time. Sounds contradictory, right?
Well, not really.
The purpose of creating deadline funnels and dynamic deadlines with evergreen expiring offers is to create a sense of urgency on a long lasting offer that will continue to stay relevant and helpful to your customer base. This allows for every customer to capitalize on the benefits you are offering.
With the use of just a couple PlusThis tools, you can automate this whole process by creating links that route the customer based on certain criteria that’s been deciphered, and show them how long they have left to take advantage of your offer.
Let’s run through an example, a new lead that opts in for email marketing. How can we create an evergreen expiring offer that drives them to convert into a buying customer within a week? 2 tools: Smart Links & Countdown Timer.
1. Set Up a Smart Link with promotional offer if they sign up in 7 days
The idea is that for 7 days after they opt in for emails, they are directed to the appropriate page with discount offer. But after that week, when they click the smart link – they will be directed to another offer page, likely an expiration page.
In order for the link to do that, we have to manage some configurations. First, we input the page with the offer that we’d like them to initially be directed to. Then, we’d like to apply a tag on those who click the link. For this example, we’ll do something simple, like “clicked offer”.

Next, we’ll decipher the rules that need to be met in order to view/accept the offer. We’ll add the group of contacts that are eligible have been tagged as opt-ins for emails, and the date is within 7 days after they opted in.
We can do this by creating two conditions, a tag based and a date based.
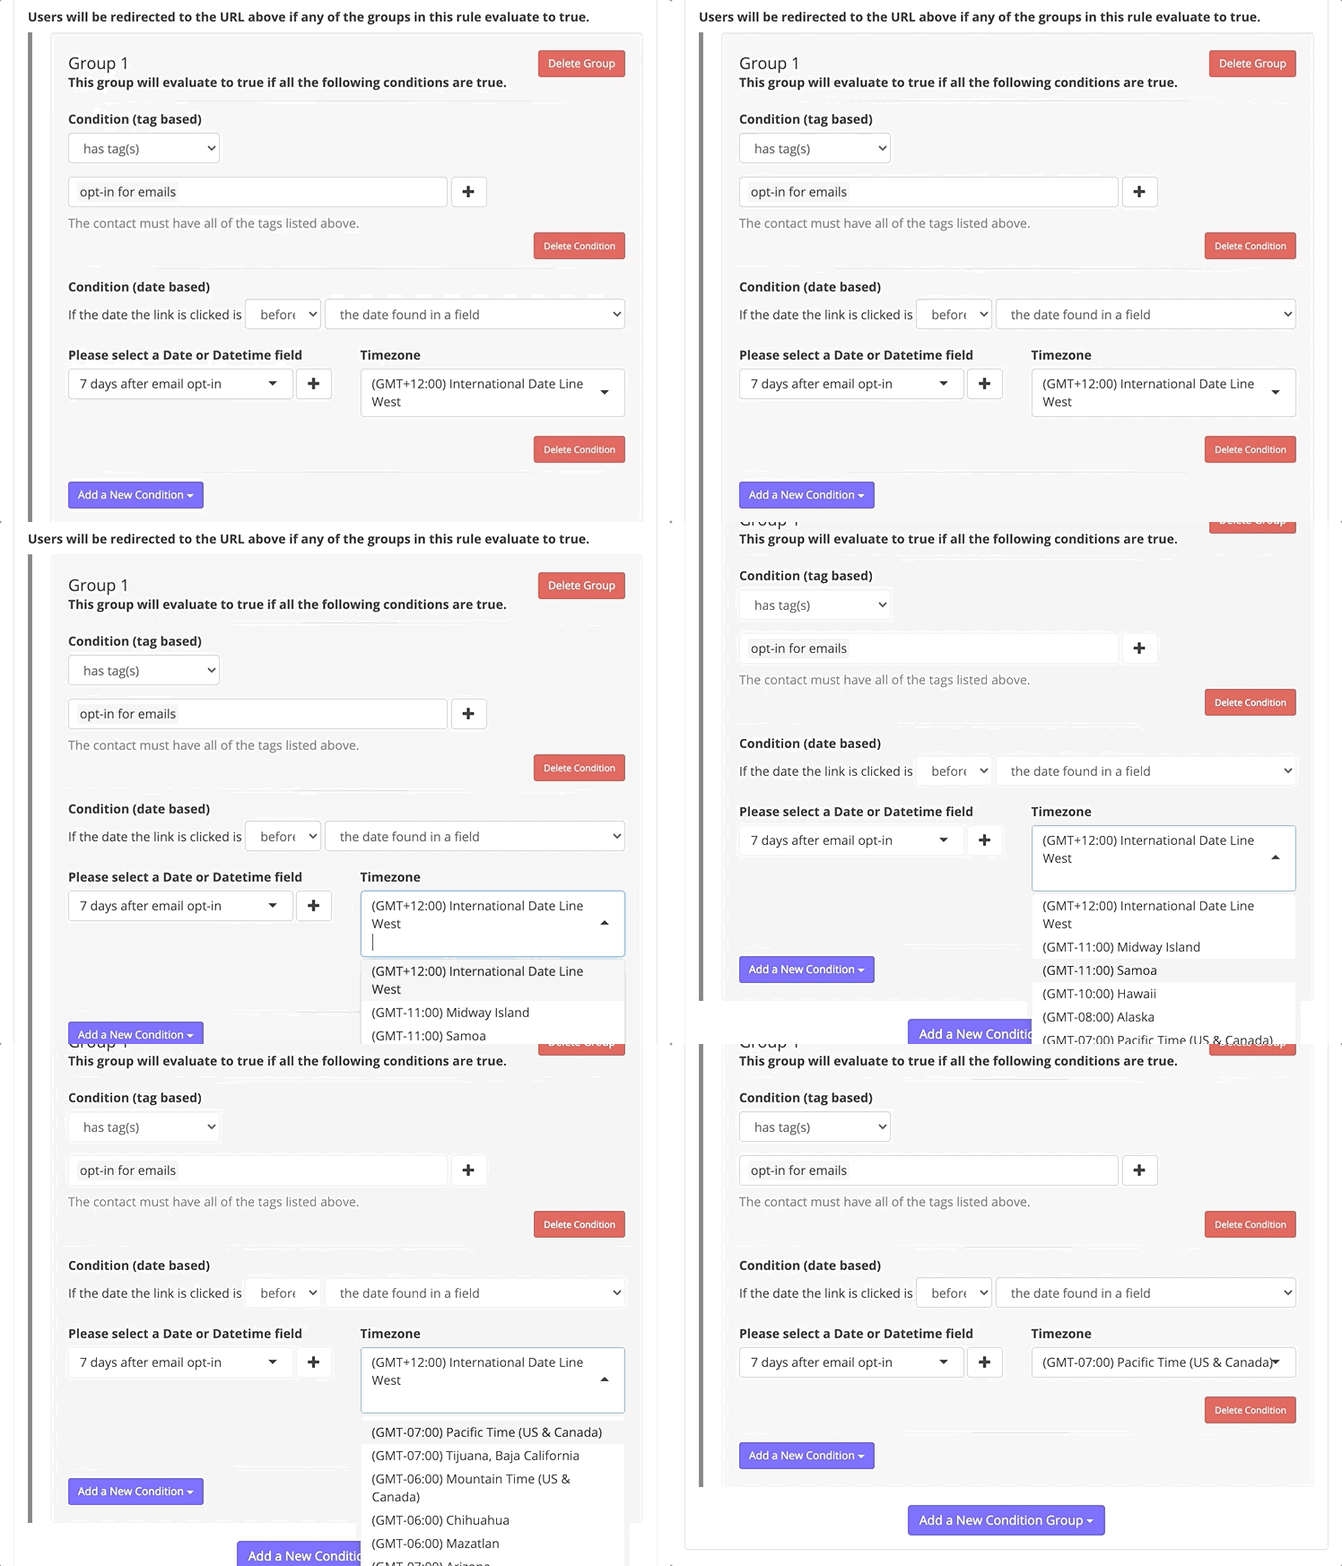
We’ll continue on to provide the page that contacts who click the link after the 7 days have passed are directed to. For this, we’ll provide an offer expired page with supplemental options for purchases.
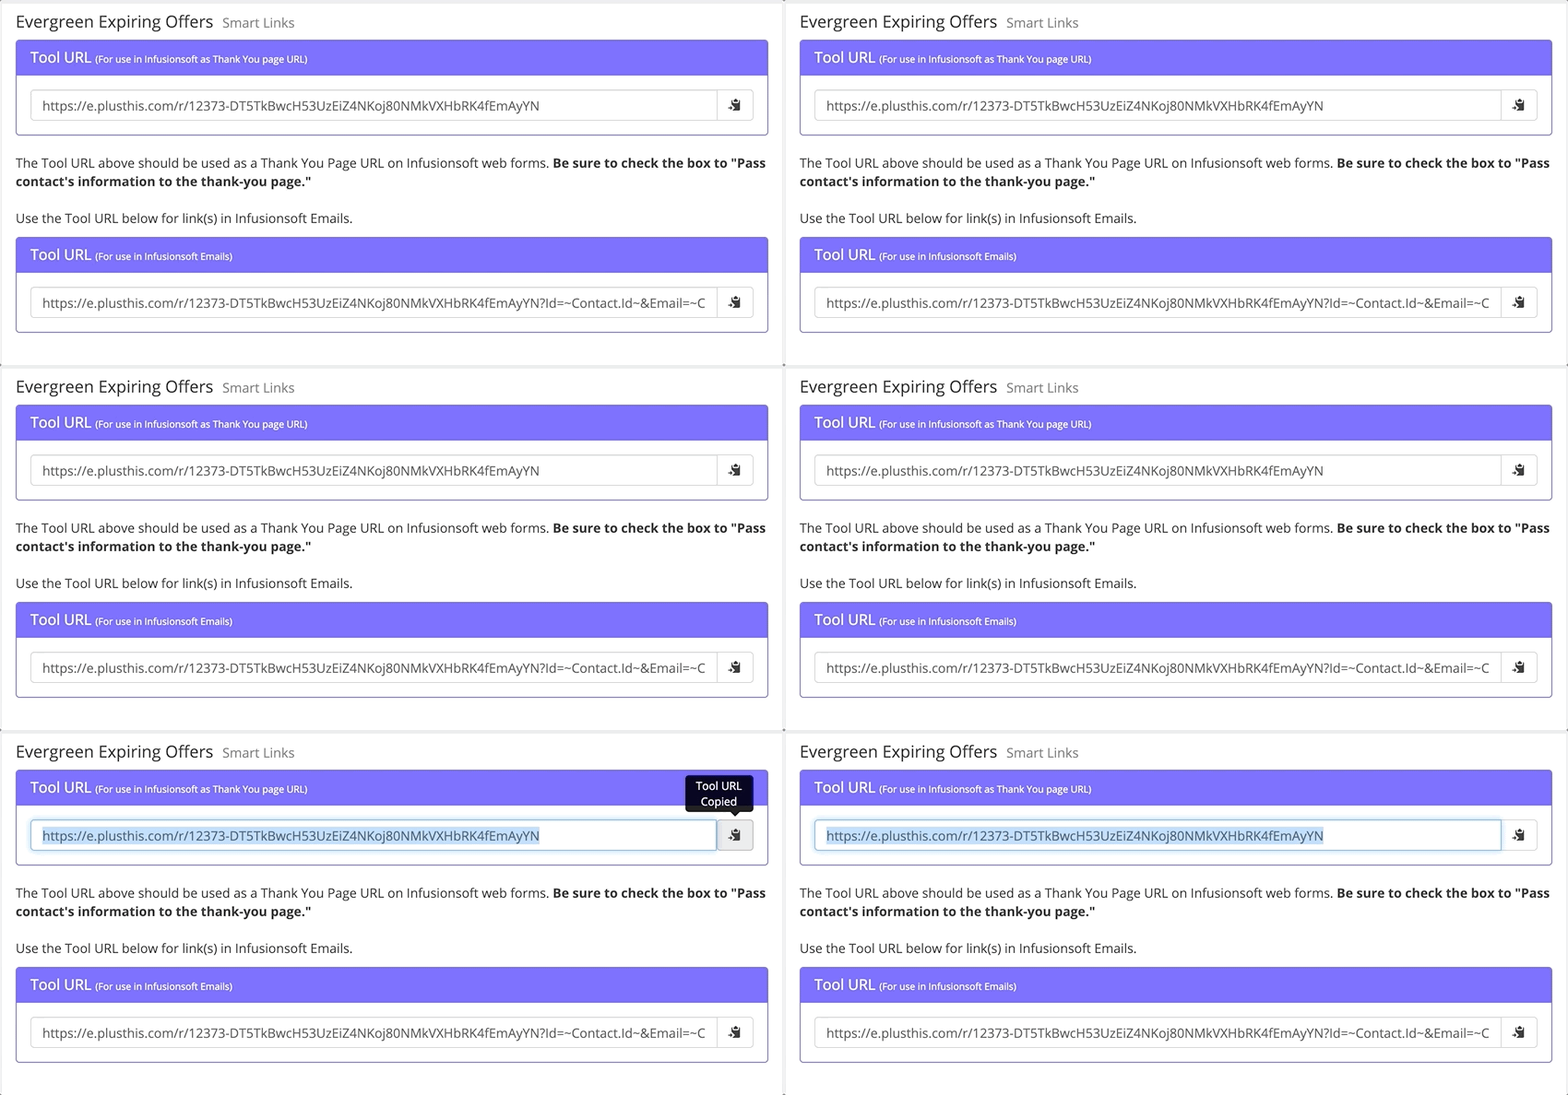
Then, you know the drill – give the tool a name and save it. We’ll receive two URLs, one for emails and one for web forms.
2. Use Countdown Timers in the emails with the Smart Link
To form a sense of urgency in regard to the expiring offer, we’ll want a way to grab contacts attention and influence them to jump on the discount. But since the offer is evergreen, but dependent on when they opt-in for emails – the 7 day countdown needs to consider that.
Luckily for us, Countdown Timers is the perfect tool to add to our email.
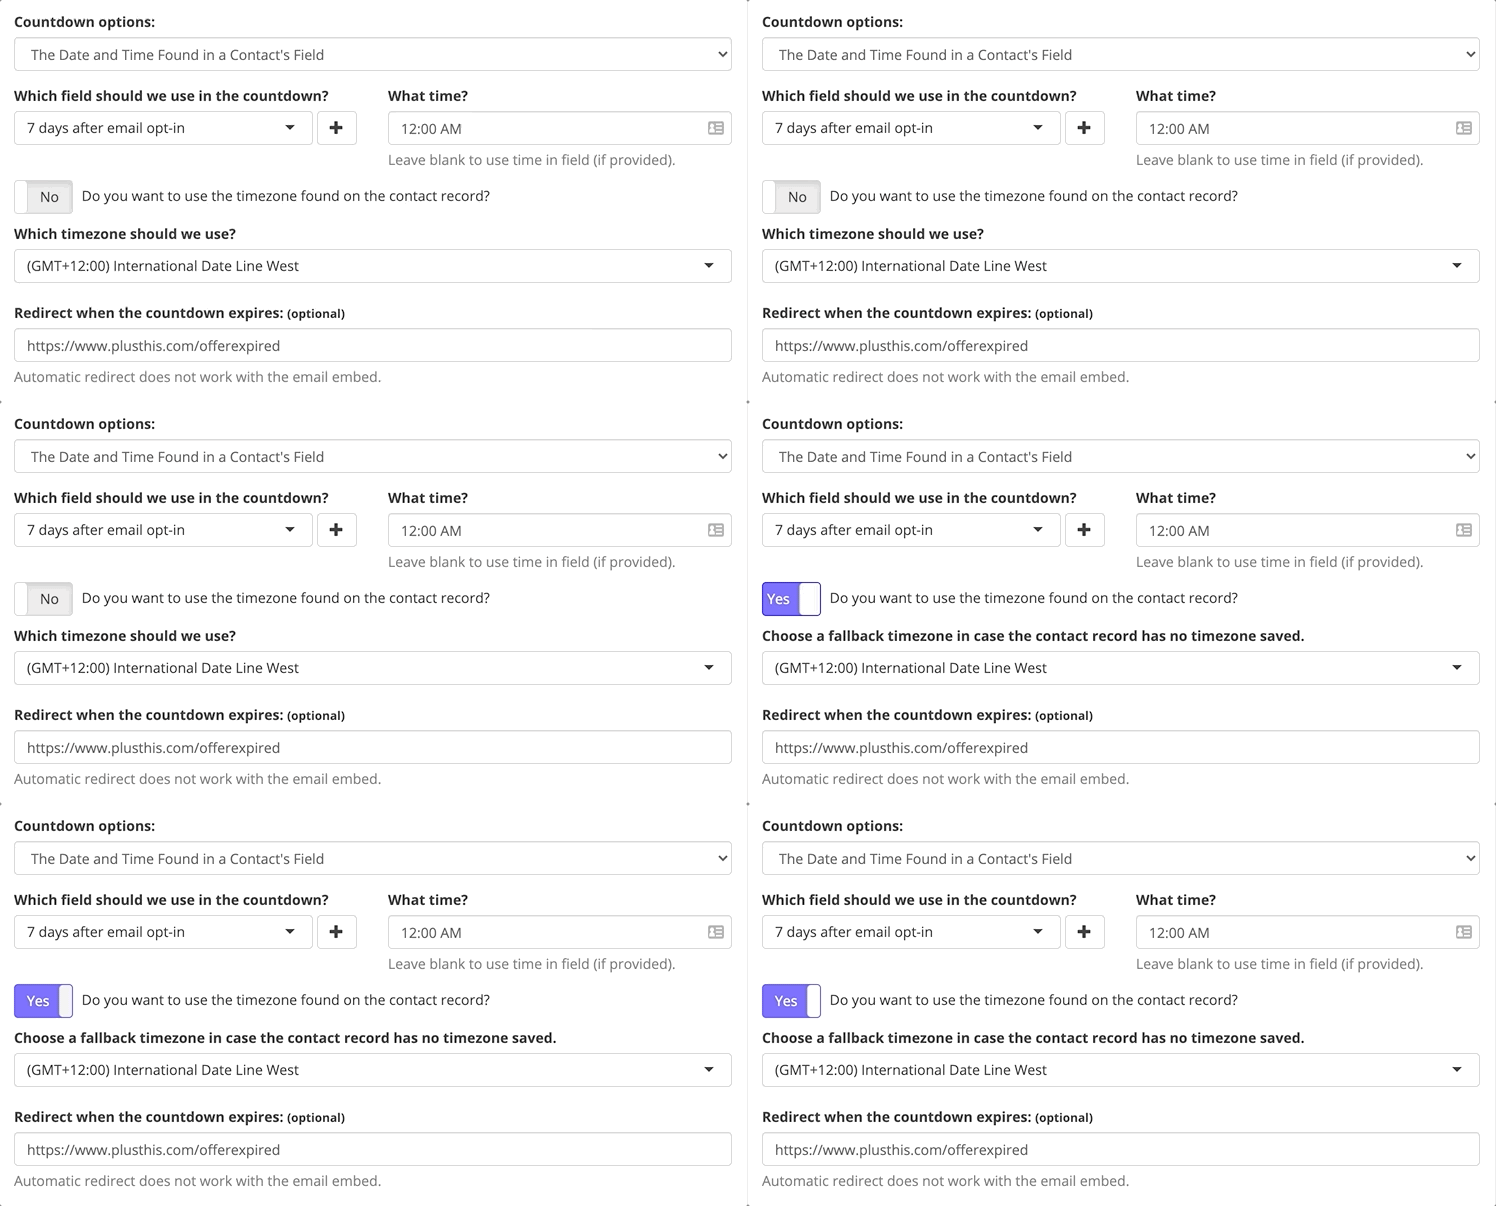
Then, the fun part. Customizing the countdown and what it appears like within the email, or on the landing page.
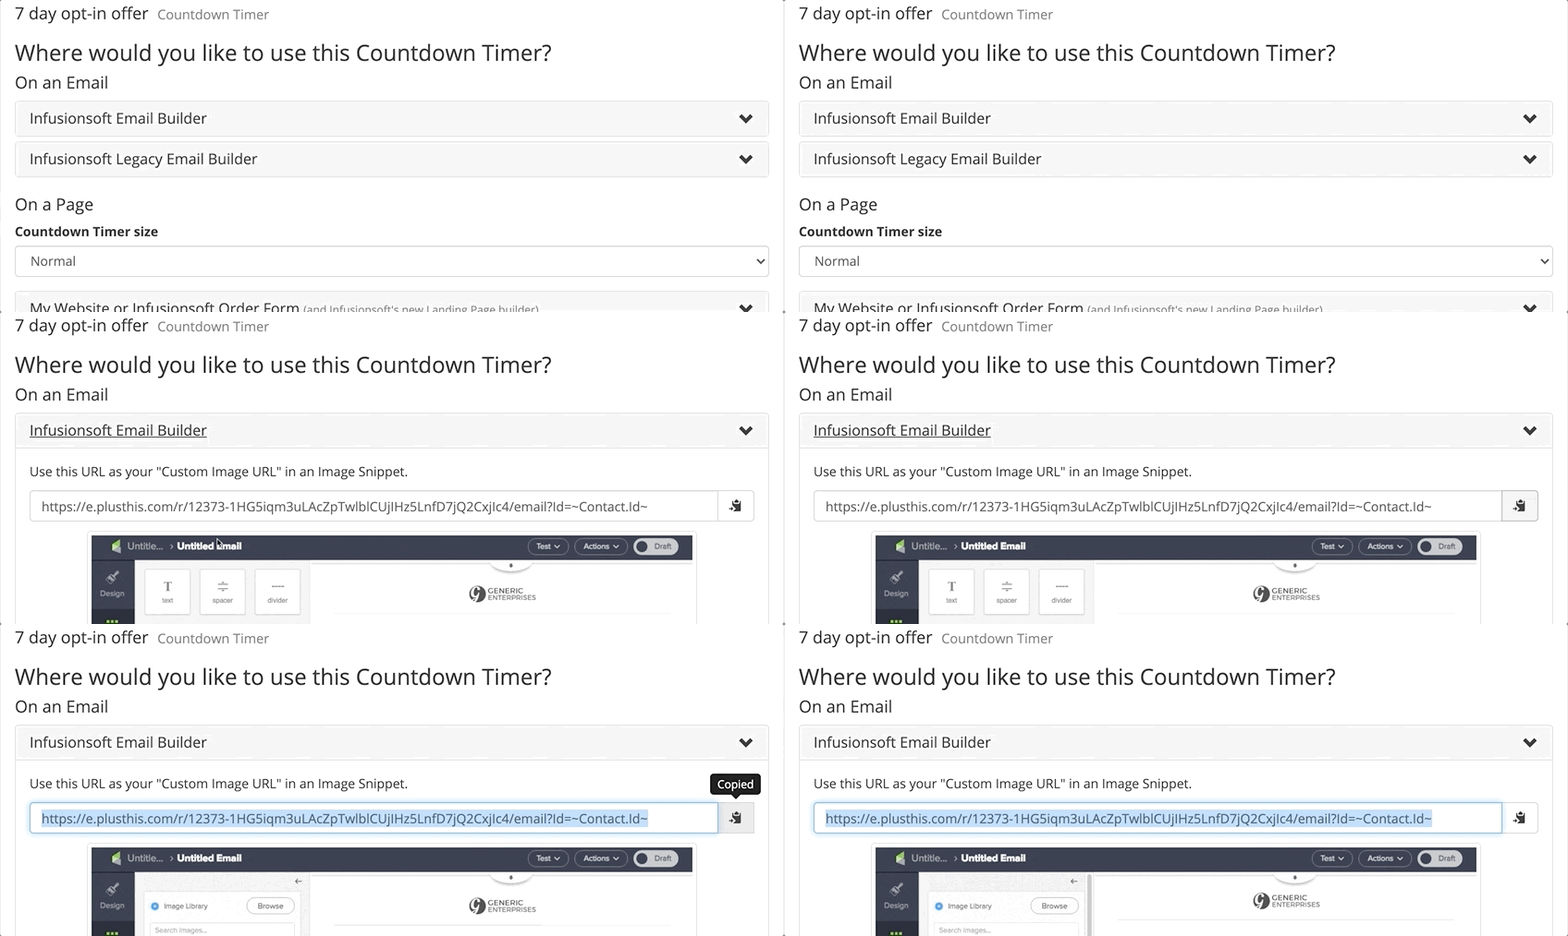
Once we’re content with the imagery of the countdown, we’ll again save the tool and receive several ways to share the countdown timer. But for this, we want the custom image URL to place into our emails.
3. Automate the tools, and send the emails
Once our tools are ready to go, we’ll place them within our emails to the new opt-ins.
Here’s what a sample email may look like.

Both the smart link and the countdown timer are included, and give the new opt-ins a sense of urgency to sign up for a new account within the first week of joining emails.
Now I can continue to offer this promotion to everyone opting in to my mailing list and have it run
automatically without having to worry about removing the link after a certain time period.

