It’s that time again! We’ve got another new tool I’m excited to share with you.
The past couple weeks, we’ve been working on a an email subscription management tool to allow contacts to opt out of certain emails, without opting out of all emails coming from you.
Sounds pretty intriguing right? Definitely.
Now, with this tool, you can add the different segments of email based on tags and allow people to select how they’d like to be contacted by you.
Let’s go through how you would set this tool up, and implement it onto your webpages.
Step 1: Find the Email Subscription Manager tool
To get started, locate the Email Subscription Manager tool within the toolkit.
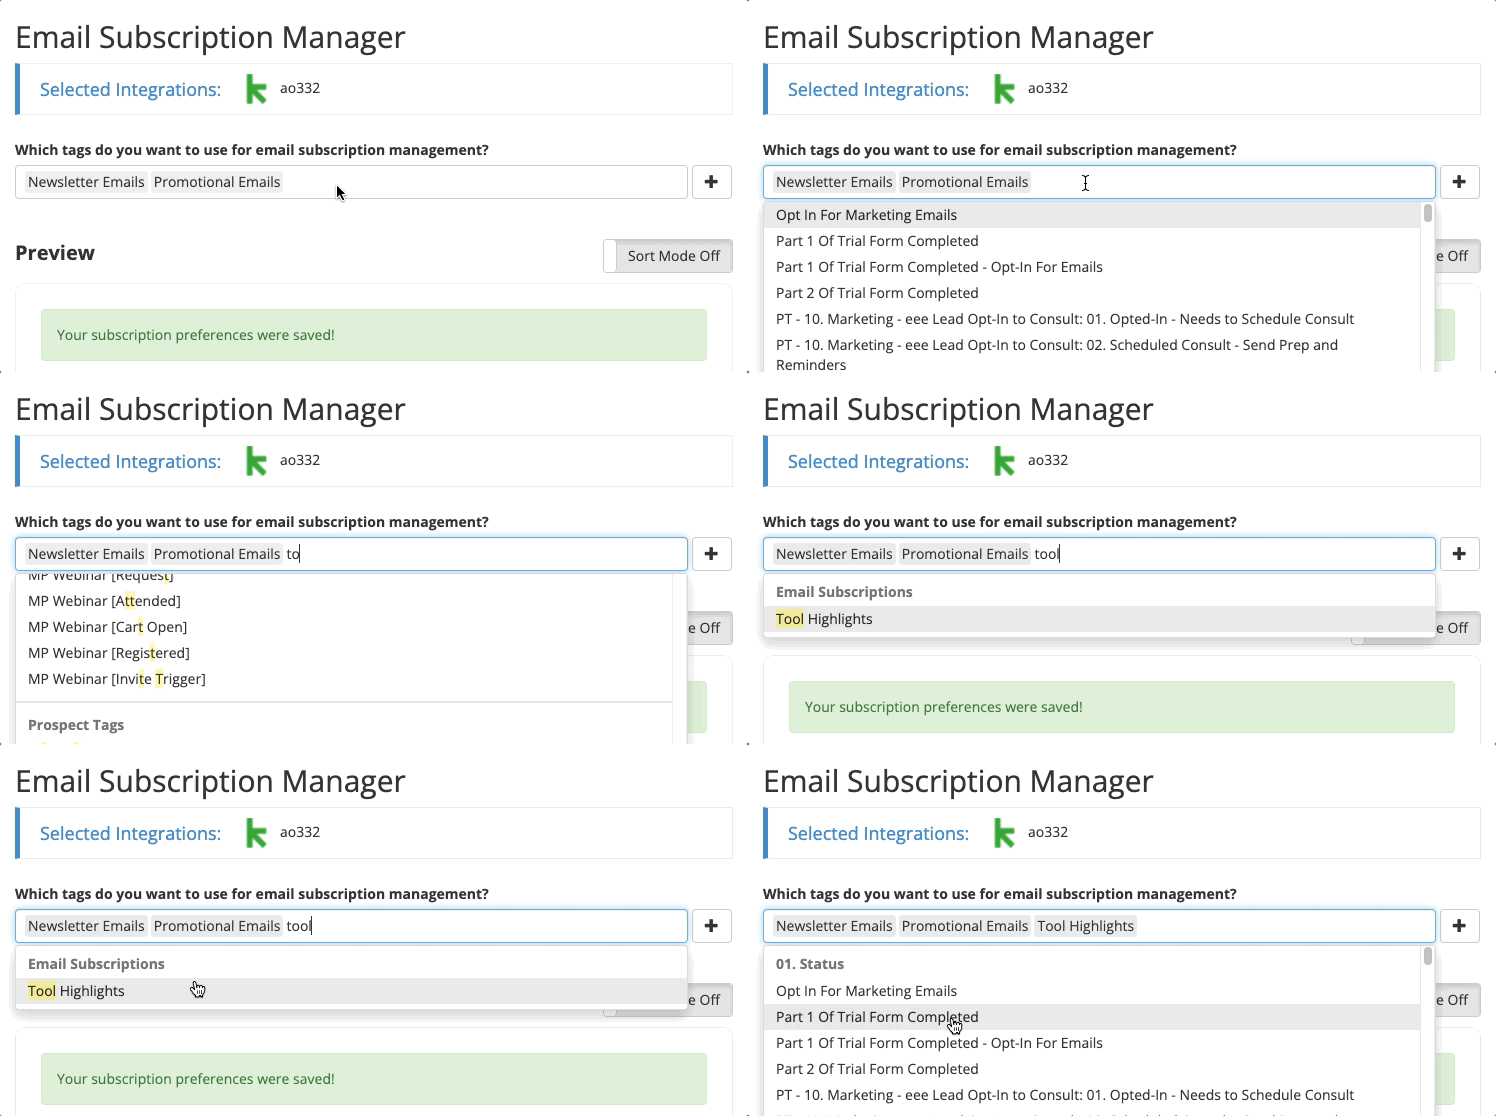
Step 2: Select the tags you’d like to be applied for each type of email
In this step, you select the appropriate tags that are applicable to each segment of emails that you send.
Step 3: Determine the layout
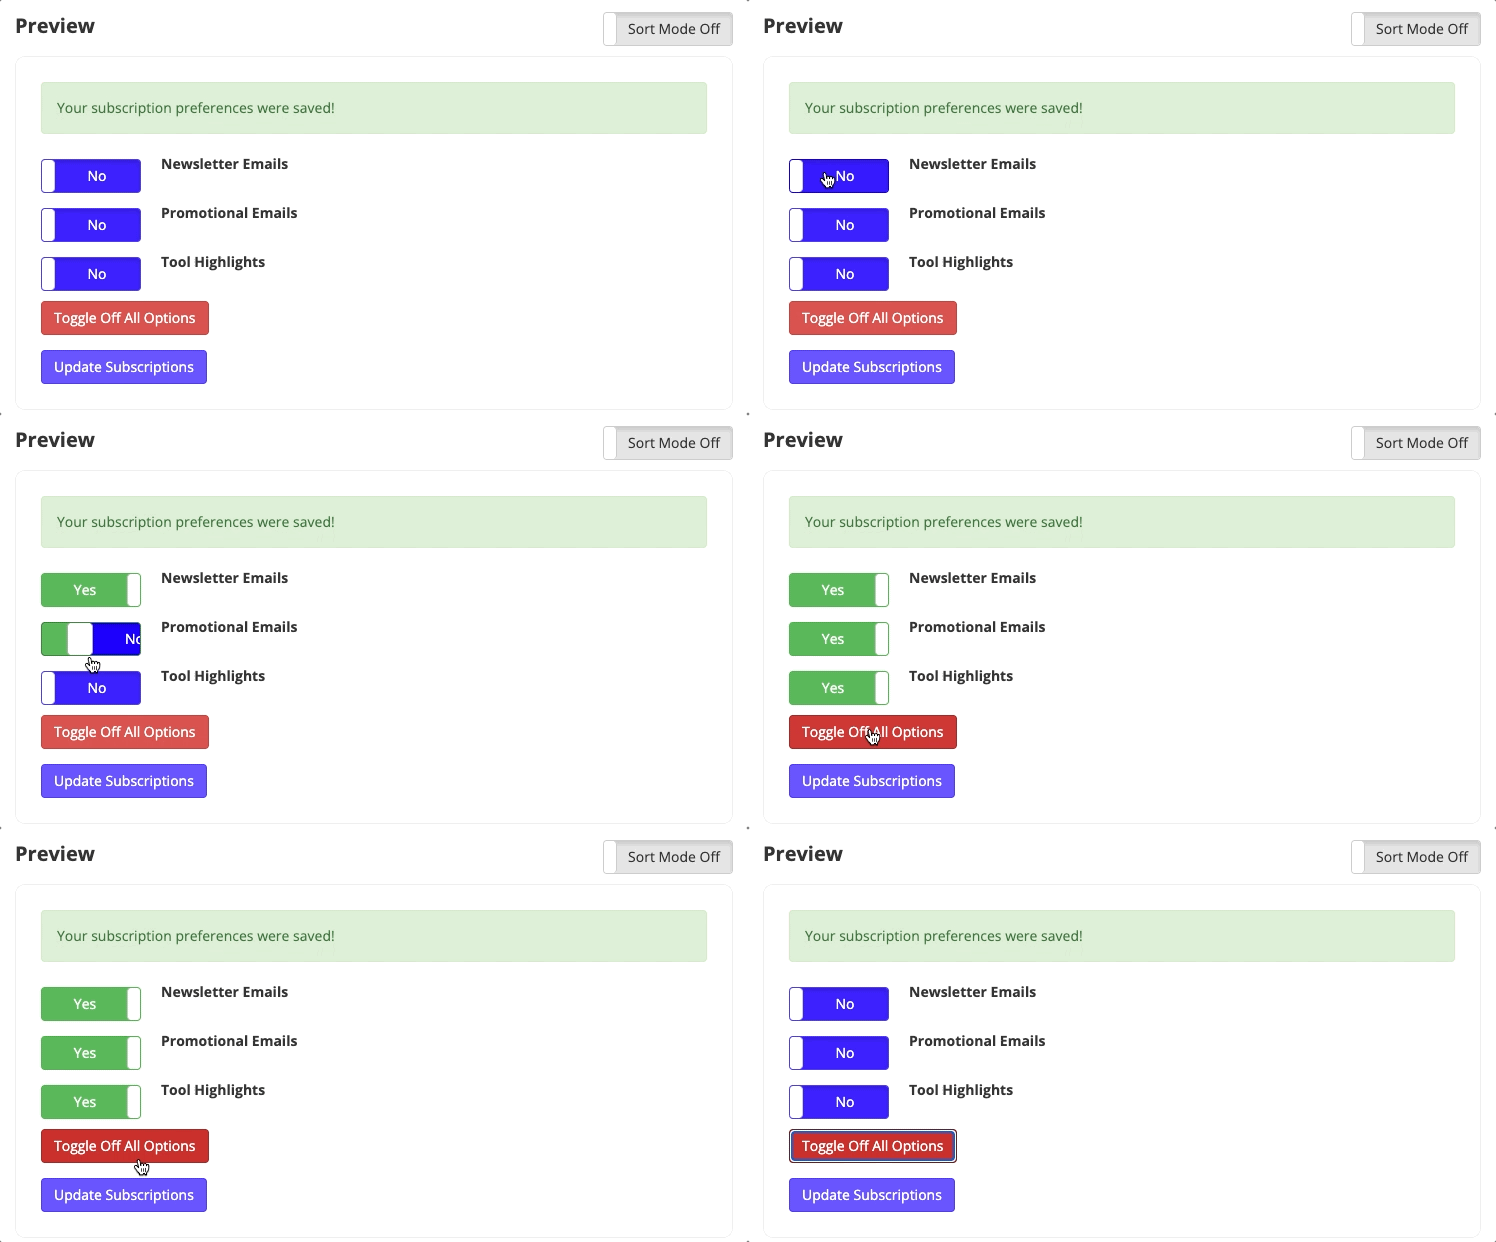
This tool allows you to customize every detail of the manager, including colors, copy and more. Establish how you’d like the manager to appear on your page.
Step 4: Preview the layout
Once you’re content with the layout of the manager, you can see the live preview of how it will show up on the page. Follow this preview along as you customize to make sure it looks how you’d like.
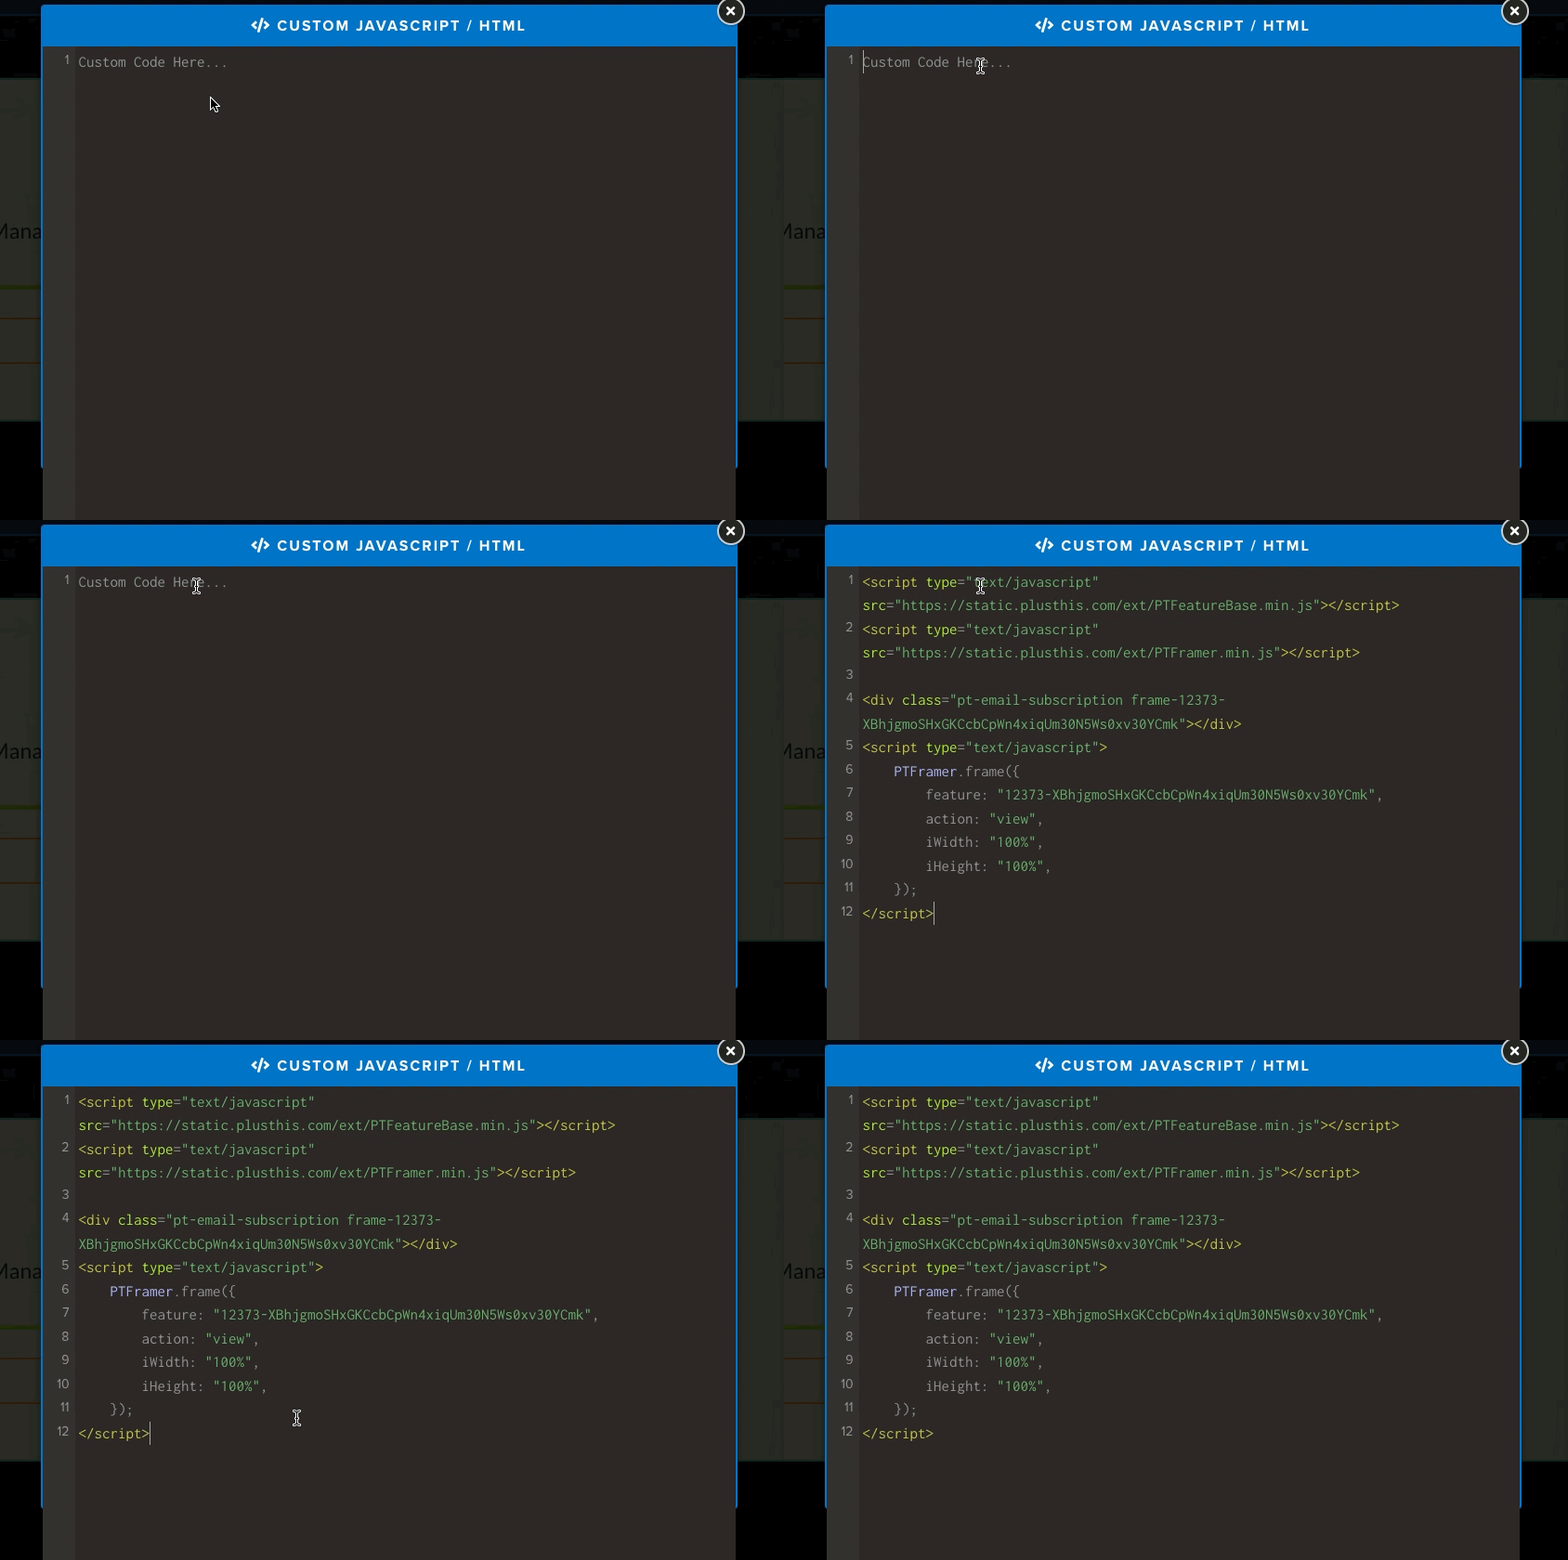
Step 5: Receive the coding to add to your webpage
Once the tool is saved, you will immediately receive the proper coding to add to the webpage. Select the method in which you will apply this tool, and copy the code disbursed.
Step 6: Implementation
If you have created a webpage for your contacts to manage their email subscriptions with you, you will simply paste the code directly into the javascript on the webpage.
That’s the gist of our new tool, Email Subscription Manager! We hope this tool makes your email lists a bit more organized, and allow your contacts to select what emails they are receiving from you.


