If you’ve been using Infusionsoft for any amount of time now, you know it’s incredibly powerful…if you know how to use it correctly.
The problem many Infusionsoft users struggle with is un-blanking the page. Coming up with a campaign from scratch is daunting and a major roadblock for most of us.
How many times have you opened up the campaign builder, only to stare at it blankly for the next 15 minutes?
And even if you do get your creative juices rolling and implement a campaign, how many times have you had the tiniest doubt that the campaign would work exactly how you planned?
What’s helpful for most of the Infusionsoft community I know, is seeing campaigns that are already working. Learn from those. And then implement the pieces that make sense for YOUR business.
So today, I want to share a campaign from one of our customers for that exact purpose.
The following is an in depth walkthrough of Russel James’s “24 Hour Evergreen Offer” campaign. We’re sharing it openly here so you can learn from it, copy it and then implement whatever pieces apply to your business.
A Little Background
Russel James is the leading Raw Chef from the UK.
He’s a brilliant guy, but he’s also got a brilliant Infusionsoft implementer in Brian Keith from Red Beard Consulting.
In his campaign he wants to offer a special 24 hour promotion to people who just downloaded his “free raw food recipes.”
But this isn’t your vanilla “expiring offer”.
This 24 hour expiring offer includes…
- A video we can track and tell who inside of his Infusionsoft application has watched it
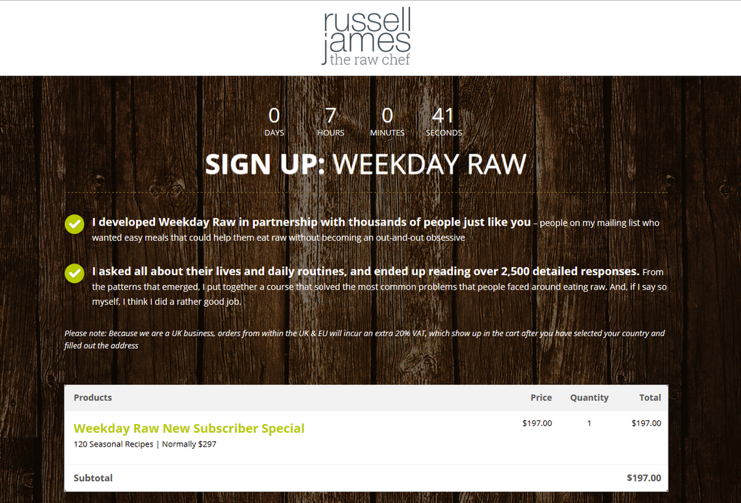
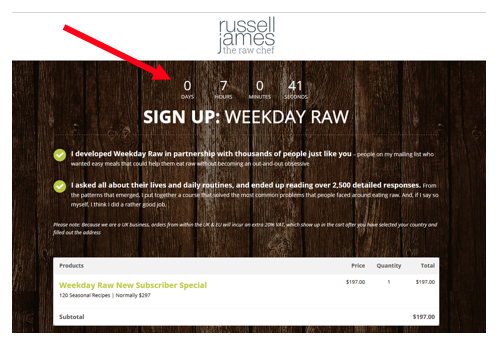
- A landing page with a countdown timer that ticks down to each individual’s unique expiration date
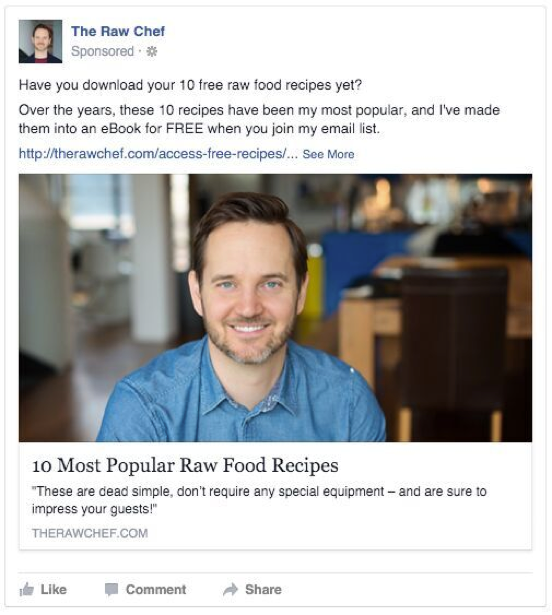
- A Facebook ad that’s automated to show only to the people who are eligible for the 24 hour offer
- Dynamic offer links that take people to the offer page when they are eligible and to an “offer expired” page when they are not
The reason I picked this campaign to share with you is because almost any business can make use of an expiring offer.
A lot of you may already have one, but trust me, you probably haven’t seen one as clever as this in a long time.
It’s also generating some notable results.
In the campaign, Russel uses a few different tools that we’ll mention as well. Feel free to use these tools in your own marketing if you feel it will benefit you.
The Campaign Flow
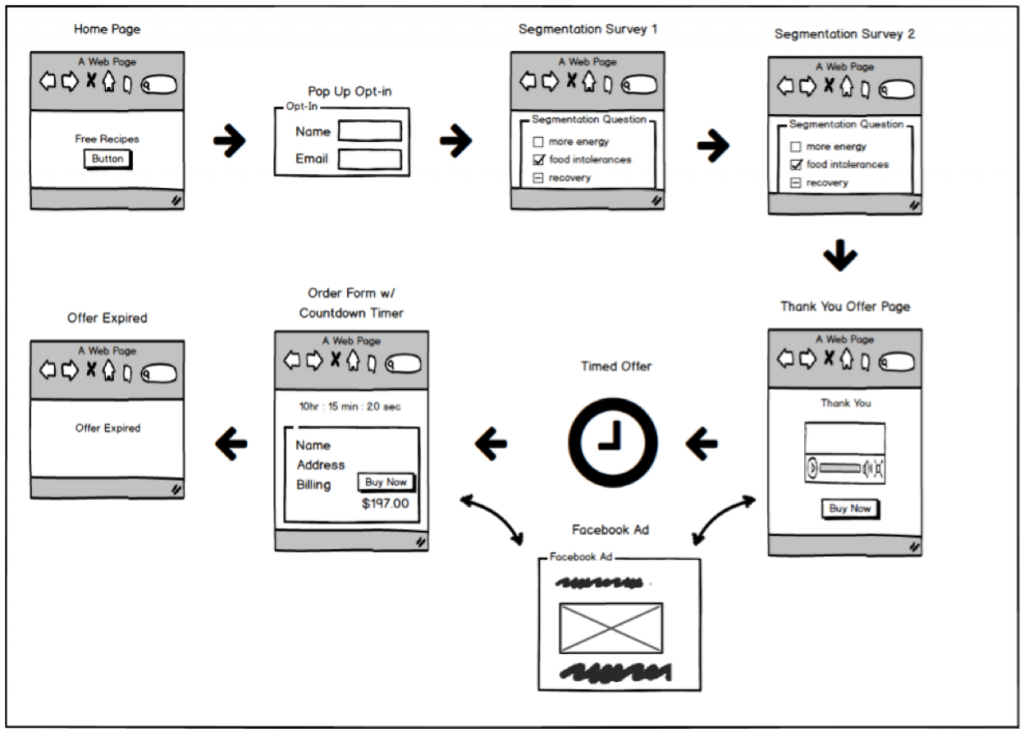
The following is a quick run down of his campaign flow. I’ll give a summary and then go through it in detail further below.
Campaign Summary
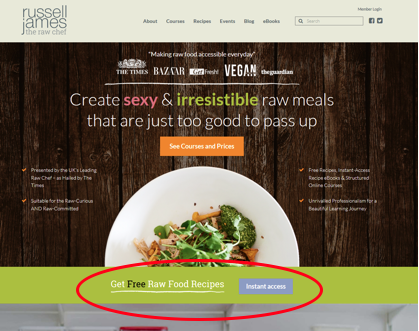
- Home page: On the homepage Russel James has a button people can click to “Get Free Raw Food Recipes.”
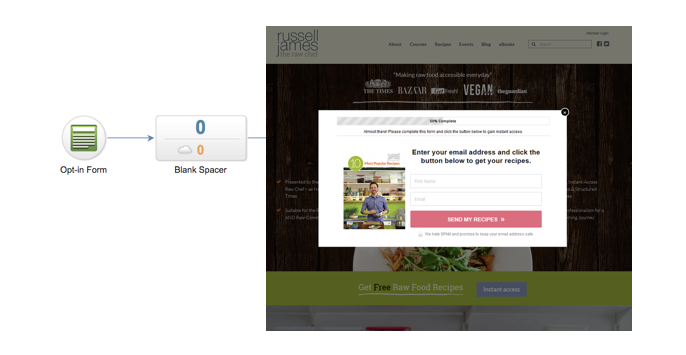
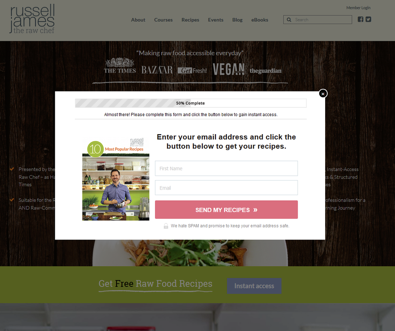
- Pop-up: He then has a Leadpages pop-up for capturing the lead
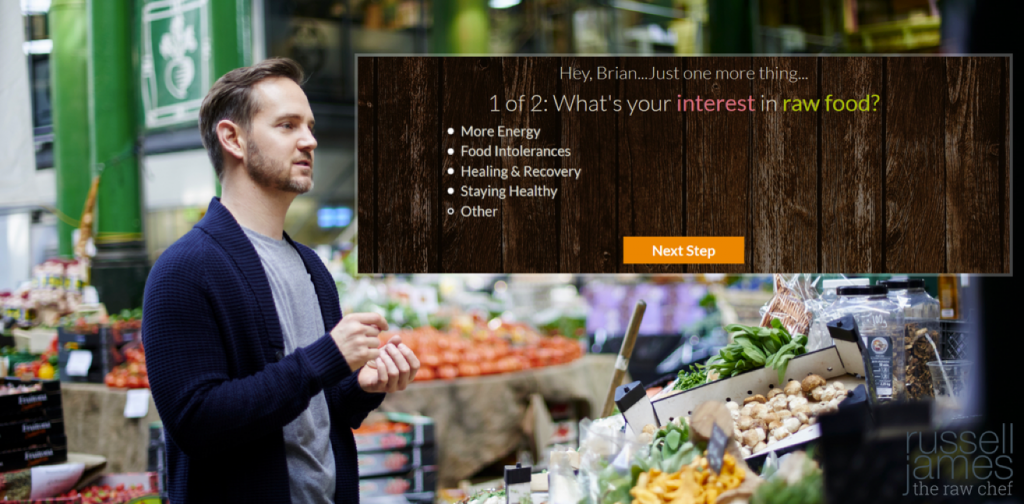
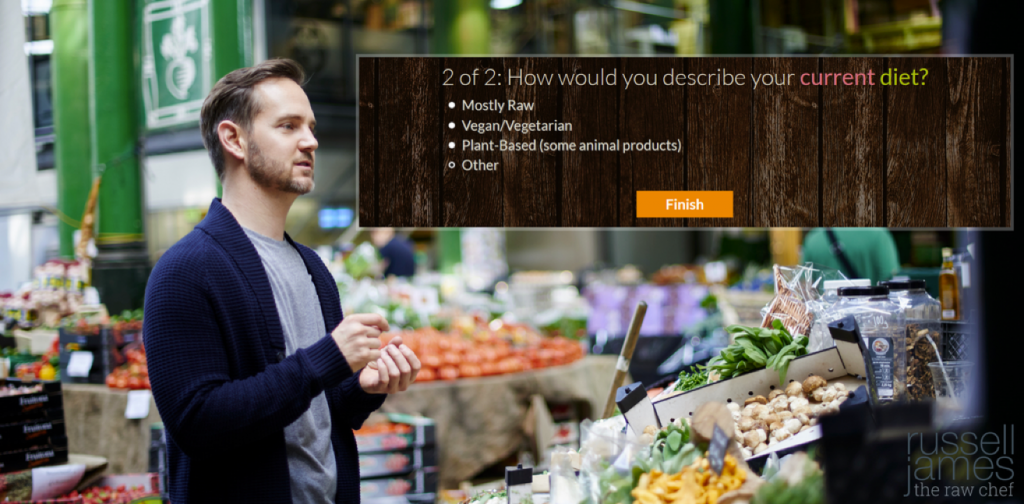
- Thank You Page: The thank you page when they fill out the lead gen form takes them to a segmentation questionnaire that is delivered in two steps.
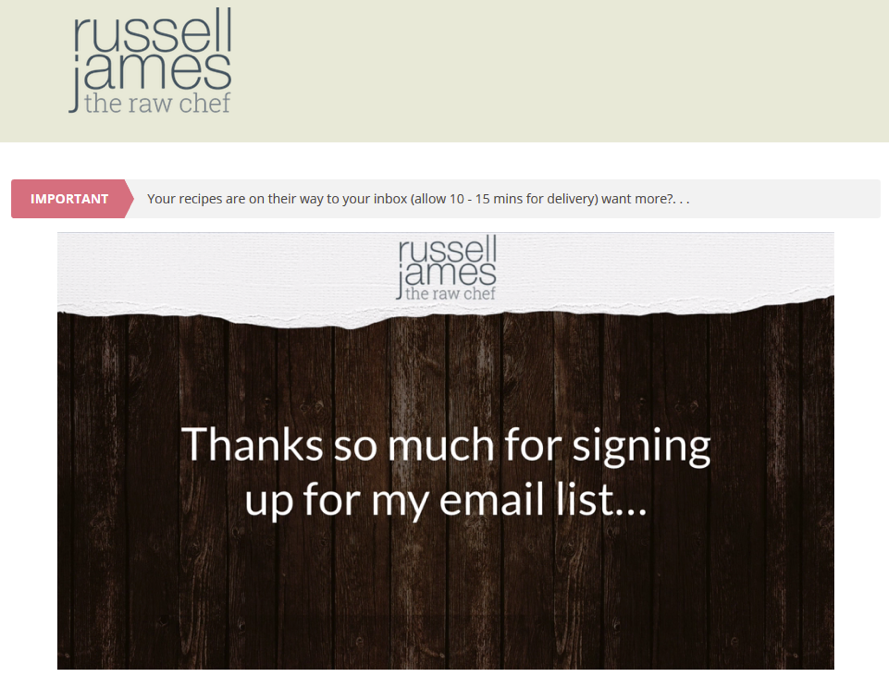
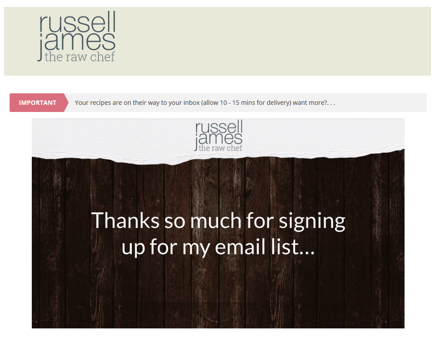
- Thank You Offer Page: The final page takes them to the offer page, where a video plays thanking them for signing up for the recipes and then describes the “Weekday Raw” program they can get a special offer on for only the next 24 hours. This video has PlusThis video tracking so he can tell how much of the video each person watched.
- Facebook Ads: For the next 24 hours, Russel automates his Facebook ads to go out using PlusThis. Only the people who are eligible for this 24 hour offer see an ad promoting it.
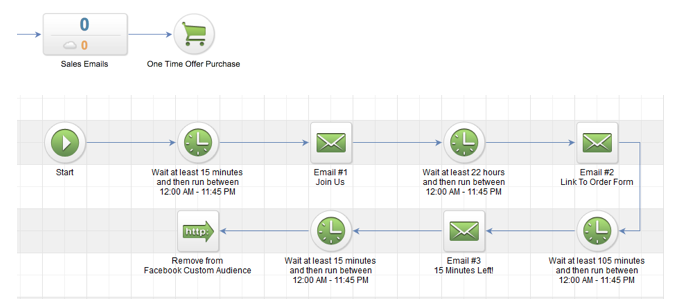
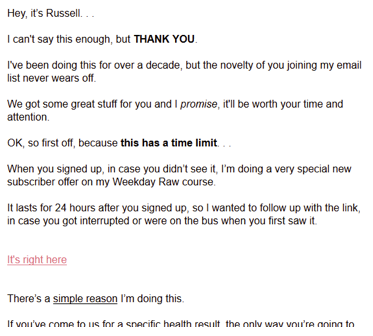
- Emails: The lead meanwhile will get an email or two reminding them of the special offer. The links inside that email are PlusThis “smart links” making it possible to send them to the offer page for the next 24 hours and otherwise sending them to an offer expired page if they click after the 24 hours.
- The Order Page: Lastly, the order page has a unique countdown timer that is set for each individual’s personal expiration date.
Home Page
LeadPages Sign-up Form
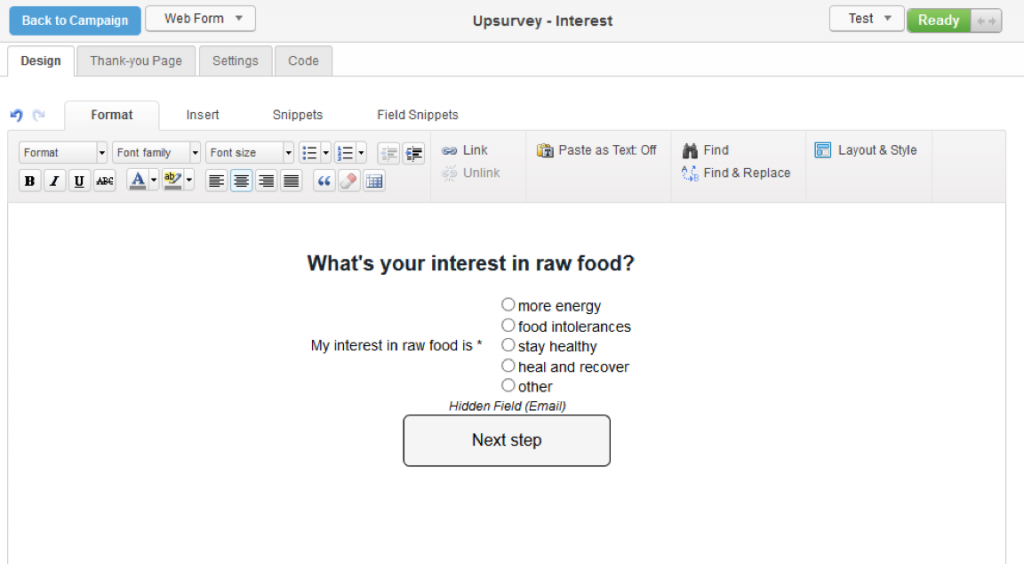
Segmentation Questions (Infusionsoft Form Embedded on a Page)
Segmentation Questions Part 2
Here’s What the Form Looks Like
Video Offer Page
Facebook Ad They See While They’re Eligible for the Offer
Offer Page With Evergreen Countdown Timer
How To Implement This Campaign
Here are the tools Russel and Brian used to create this campaign
- Leadpages (opt-in form…optional tool but highly recommended for any serious Infusionsoft user).
- PlusThis – Download a Free Trial here. (PlusThis is heavily used in this campaign to automate a number of things including the video tracking, Facebook ads automation, dynamic links for the offer page and countdown timer.)
In PlusThis specifically, here are the features used in this campaign
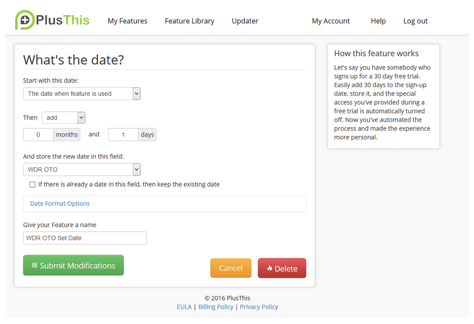
- What’s the Date
- Facebook Audience Triggers
- Countdown Timer
- Video Triggers
- Calculate Customer Value
Video Walkthrough of the “24 Hour Expiring Offer” Campaign
http://plusthis.wistia.com/medias/yz5fu3nuyh?embedType=async&seo=false&videoFoam=true&videoWidth=640
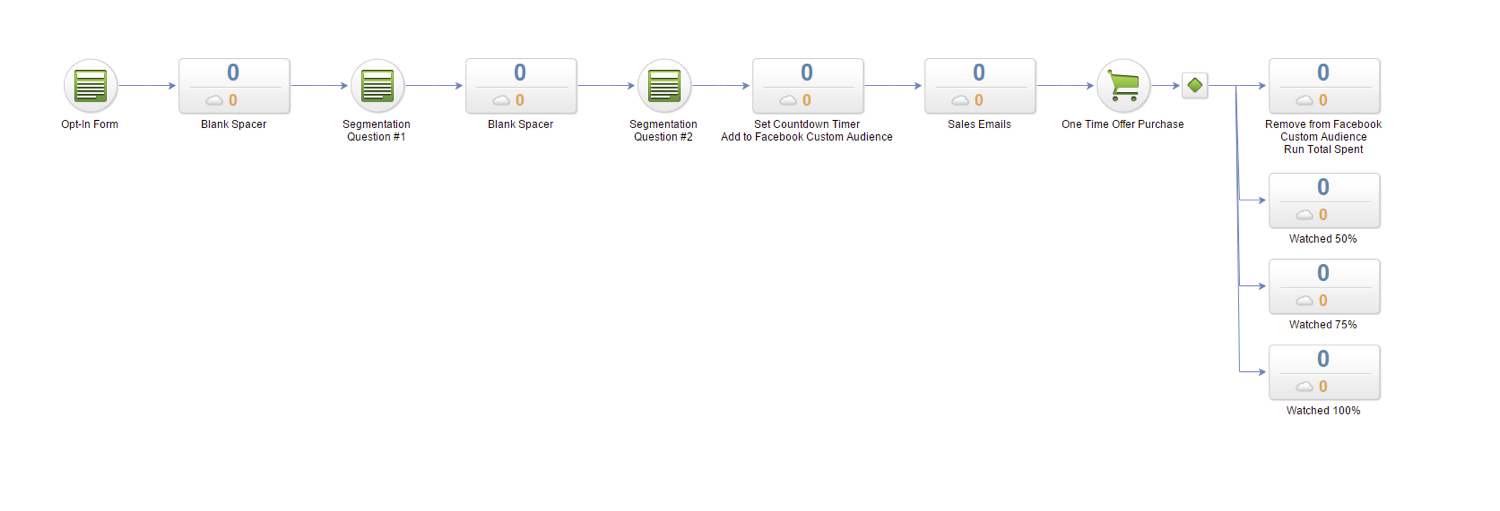
What the campaign looks like inside of Infusionsoft
We’ll walk you through it step by step.
He starts with the Opt-in form asking for First Name and Email. The Blank Spacer sequence afterwards is included because he can’t link goals back to back in Infusiosnoft so we need a sequence between them. It is literally an empty sequence. I’ve also sometimes put a timer in there to add a tag after a few minutes as a way to push someone out of the sequence if they get stuck for some reason…ie never filling out the following form.
This is the webform you see on the page here. He simply embedded it onto a page. You can use something like Optimize Press to make pages like these without any coding experience. The email field is passed to this form and hidden.
Same thing as before- just another form and page.
In order to get the countdown timer on this page to be evergreen and unique to every person who signs up for the recipes, he setup two features from PlusThis: “What’s The Date” and “Countdown Timers”.
Inside of PlusThis we use the following setup for “What’s the Date.” We basically are saying we want to set an evergreen date for “1 day” after this feature is run in Infusionsoft. Note that “1 day” actually means 24 hours if you are using a Date/Time field.
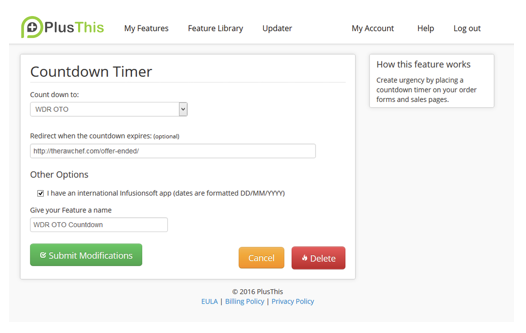
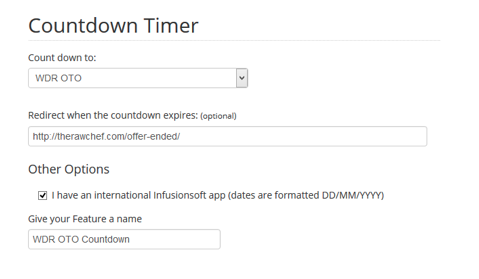
The ”Countdown Timer” feature is set to the date we set up in the previous step. This will make it so the Countdown Timer will always appear as 24 hours after someone completes the Upsurvey. In addition, this countdown timer is now unique to every contact that sees it.
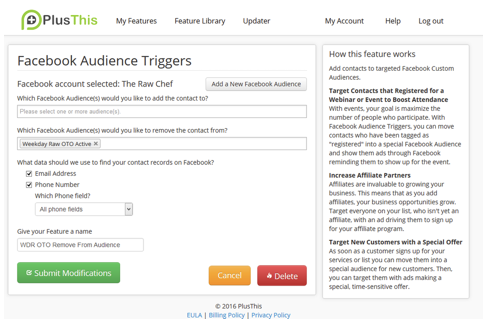
Next, we want a Facebook ad to show once they’ve signed up for the recipes. We’ve created a custom audience for “Weekday Raw OTO Active.” When someone signs up for the recipes, they are added to the Facebook Custom Audience for that campaign. We’ll remove them from this campaign after 24 hours or if they buy, in a later step. Here you see the Feature that removes them from the audience.
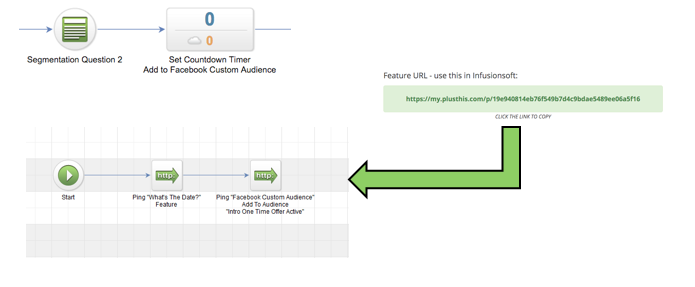
When you finish setting up most features in PlusThis, you are given a URL to place in an HTTP post. The sequence below, is where we put HTTP Posts to run the PlusThis features. Note that I call it “Set Countdown Timer” in the sequence name, but I’m really running the “What’s the Date?” feature. You’ll see why shortly.
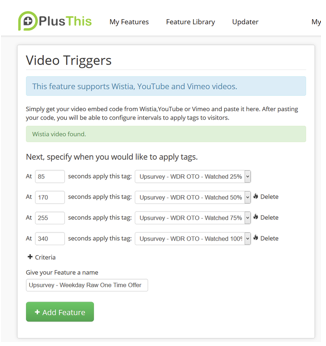
Next, for the video page, we’re playing a video where we want to track how long someone is watching it. To do this we need to setup a “video trigger.”
A video trigger allows you to set a time on a video for when you want to apply a tag. PlusThis will give you an embed code you can use for your video. Now you can see which contacts are watching your videos and for how long and track sales based on buying behavior.
For the next day we send 3 emails. This may be aggressive for your audience, so adjust for whatever works with your prospects. At the end of this sequence we remove the contact from the Facebook Custom Audience through PlusThis using a Facebook Audience Trigger.
In the sales emails we have a Countdown Timer link from PlusThis. This link will send them to one of two places based on the date and time in a custom field.
Here we setup the Countdown Timer link used in the sales emails. This feature generates a link where we can send people from an email or from a webform. If the contact clicks the link before the time in our custom field runs out, they go to the order form. If they click after the date/time in the custom field, they go to the Expiration URL you see below.
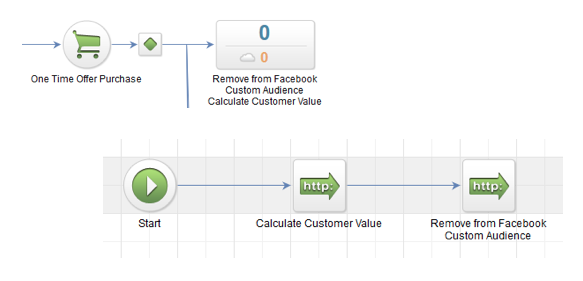
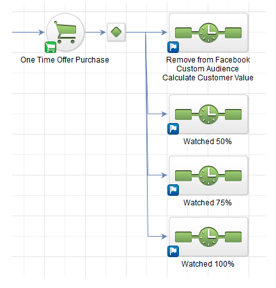
When a contact buys, we use Calculate Customer Value to store buyer behavior like Total Spent in a custom field. Then we remove them from the Facebook Custom Audience so they don’t see ads for the offer.
Lastly, we sort purchasers by how long they watched the offer video. This makes it easy to see who bought what. We can also tag buyers so followup is customized depending on how much they engaged with the video.
In the decision diamond, simply set the rule to the tag you made for each of your video triggers.
Next Steps
- Start Your Free Trial of PlusThis: The best way to learn is to get in and start playing with the tools.
- Download Campaigns of the Titans: If you enjoyed going through this campaign example and would like to see others like this, you should download Campaigns of the Titans. It contains over 200 pages of campaign walkthroughs including the one you just went through.
- Check Out the Idea Guides: We have a library of videos showing the most popular use cases for PlusThis. Including SMS messaging, GoToWebinar integrations, Facebook Ads, split testing and more.

